


– By #Pioneer Auto Show
Spending a month or two driving across the country - exploring national parks, adventuring in the forests of the Pacific Northwest, relaxing on pristine coastal beaches - sounds like a fantastic dream. The reality however, generally has something to do with the expense of a trip like that. We simply can’t afford that kind of travel. Or can we? What if we could cut out all of the lodging costs? What if we didn’t have to eat out at restaurants? What if we could simply travel city to city, or park to park, and pull into a campground each night? Those are some things we could get on board with!
That’s where the travel van comes in. For the sake of this article, and our wallets, we’re going to keep this idea pretty basic. There won’t be a bunch of talk about stand up showers or indoor plumbing. You won’t see any sophisticated entertainment options, or feng shui inspired interiors. We’re keeping it bare bones. That’s how we’ll be able to afford this epic adventure.
We think we have this idea pretty well thought out after doing some research, and that this dream can be put into real life by following these fairly simple steps:
Step 1: Finding and buying the right van
First thing’s first. Set a budget, and try to stick to it. You may have to travel a couple hours away from home to find the right van at the right price, but consider it a possibility. The van life is a trend that has caught fire recently, and people are now selling their old vans for much more than in previous years.
Next, make sure you’re buying a van that is mechanically sound. You want to spend time traveling, not making repairs. You can be as open to dents and dings as you want, rusted paint, ugly grill, whatever, but make sure you’re not going to be breaking down in the middle of nowhere. Check it over really well before purchasing. Another thing to consider is how far fuel will stretch. Obviously, we’re not expecting to get 30 mpg in an old van, but if we can get at least 15-18, we’ll be alright.
Now go ahead and find whatever size van you think will fit your needs. For most, a full size conversion van is the way to go. Now, if you’re really ambitious, and have the extra time and ingenuity, a short school bus will really allow you to make a unique space. But, we’re keeping it simple (for now).
We’re thinking something like this old Chevy would work 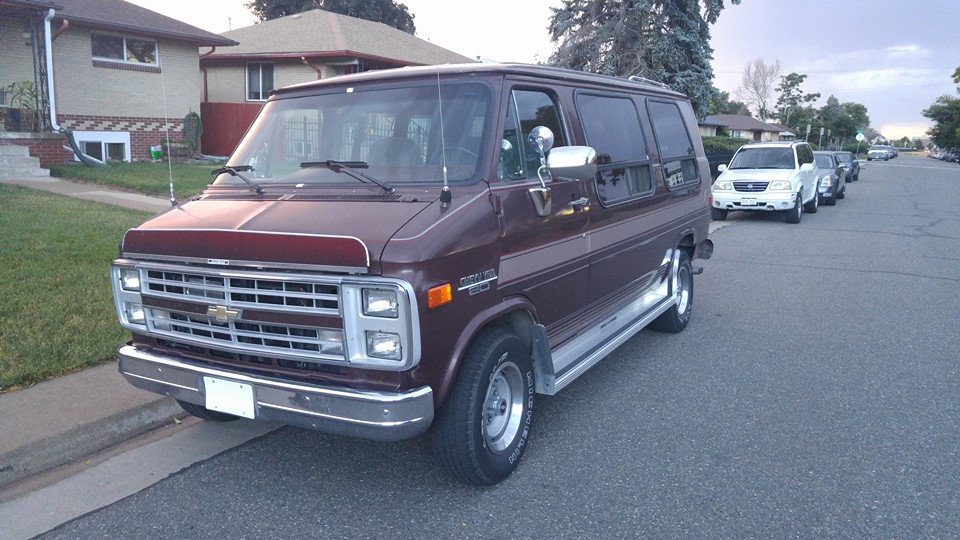
Step 2: Gut the interior and clean
Get out the elbow grease; it’s time to get to work! Unless you’re lucky enough to find an old van that has already been gutted, you’re going to have to spend a day clearing it out.
Start by taking out the seating and anything else that gets in the way of your soon to be traveling oasis. Funky smelling carpet with years’ worth of stains? Rip it out. Or if you think it can be salvaged, get some industrial strength carpet cleaner and start scrubbing. We’re working on a budget after all. The idea is to have an empty canvas to work with.
Step 3: Measure everything
Be thorough here, and measure everywhere. Length, width, height, wheel wells, windows, should all be measured to make things easier as you go along. This is one of those steps that people will neglect, and it’ll cost you much more time and effort, not to mention money, in the long run.
Step 4: Start your blueprint
Now’s the time to start mapping out your vision; make a list of the things you want to go inside, and a list of all the little things that may be of concern. Is there room for our dog, where will we keep our clothes, do we really need running water - these are all things that you need to start considering now.
Start measuring how much space each element will require, such as the bed and sitting area. How much space will be needed for a cooking counter, or a working desk? Getting these down on paper will allow you to start deciding what’s in, and what’s out. That’s right, friends, you’re going to have to make sacrifices. Having every little thing you want in your traveler is highly unlikely.
Get out your paper and pencil (you’ll be erasing a lot) and start making a diagram. Things are getting serious now.
Step 5: Build your foundation
We think the most important aspect of our travel van should be the bed. If nothing else goes right on any given day, we at least want comfort when we sleep at night, right? So let’s start by building a foundation using 2x4’s and 2x6’s, with plywood for the top and bottom. It’s fairly simple really, just a bit time consuming.
Next we’re going to need some counter space. You can get as intricate as you want by building your own, or you can choose easy and just move in an old kitchen counter found elsewhere. Again, we’re thinking simple. Building your own is not extremely difficult if you’re a bit on the handy side, as with the bed foundation. Keep in mind the storage space you’ll need to include in your counter. We’re going to want to be able to put a camp stove on top, as well as keep some cleaning products underneath.
Step 6: Privacy
Don’t overlook the need for some privacy! You’re going to want to either buy or make some curtains for your windows. Whether staying in a campground, or parked on the street in a residential neighborhood, you don’t want people looking in and staring at you, or your glorious travel van.
Step 7: Think about the basics
In the week prior to packing up your new travel fan for its maiden voyage, you may want to make a list of the basics that come to mind. Portable chargers for your devices, laundry line for drying clothes, push button lights for keeping you out of the dark at night, solar powered lamps, are all ideas of things that often get forgotten.
You’ll want to travel lite, so keep in mind the storage of all those items. You’re also going to need the essentials:
- Camping chairs
- Camp stove
- Cutting board
- Utensils
- Plates
- Extension cords
- Pots and pans
- Fire extinguisher
Step 8: Organization
Once you have all your essentials on hand, it’s time to learn how to start storing things as efficiently as possible. Now, we’re not experts, but we do have a couple of ideas. Utilizing storage bins that fit under the bed, as well as making creative use of the vans wall space, are simple things you can do that work wonders.
Step 9: Re-think step 8
Seriously, maximizing your space in your travel van is a big deal. If you plan on going great distances for extended periods of time, you’re going to find out just how much you can’t live without some of those little things you’ll want along the way. A simple Google search can go a long way in helping you become a master of organization.
Step 10: Go live the dream
You’ve built your little traveler, loaded it to the rim with all your essentials and even added a few plants to make it feel like home. All that’s left now is an oil change, filling up the tank, washing the windows, and creating the perfect playlist. If you’re the happy wanderer type, just get in and go. If you like things to be a bit more planned, then do some research into campgrounds that are available along your journey, or find out local county laws regarding sleeping in vehicles wherever you plan on stopping.
Be prepared for the unknown, and be willing and ready to enjoy every moment of your journey. Take lots of photos, keep a journal, and send us an email when you get to a place with Wi-Fi. Go live the dream, there’s so much more out there than your backyard and your office day job.
If Murdo, South Dakota falls along your travels, make sure to stop by the Pioneer Auto Show to say hi and check out the 1989 Ford conversion van that will be on display starting in 2020! We’d love to check out your travel van and hear about your travels!
Last Modified: